Grade 6 – Scribble Maps & Google My Maps Ski Trip

Grade 6 students have recently been working on a distance and mapping project – they planned out a ski trip around the lesser known ski hills of Maine, the first stage being researching locations, costs and distance. To help plan out their trips and see where the different ski hills are located in relation to each they used Scribble Maps to create an annotated layout of the different locations.

Students had to locate each ski hill, draw a polygon shape across where the ski trails were located (this made sure they were in the correct location), and add a push pin and a text label (which can be seen at all levels of maps zoom).

Here is what an individual ski location ended up looking like:

download

And here is a completed ski map zoomed out to see all the different location points:

download (1)

Once students had completely planned out their route, including distances and resort prices they used Google Maps to determine an exact driving route. We then used all this data to create a final Google My Maps map with the route for each day from resort to resort and a marker for each stop displaying the name of the resort, an image of the ski area and short description.

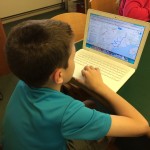
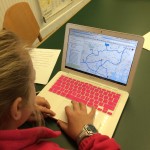
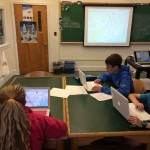
Here are a few shots of the students working to create their maps:
And the final route maps are embedded below:

Posted in Tech in the Classroom | Comments Off on Grade 6 – Scribble Maps & Google My Maps Ski Trip

Modern Storytelling – Super Hero Comic Books

The assignment was simple: tell an illustrated story in ten pages using the Comic Life app on the iPad. The difficulty lay in the mixture of specifics (length) and open-endedness (no further instruction on content). We wanted the students to be able to tell a fictional or non-fiction story and work within any genre they prefer, as well as being able to choose if they would draw or photograph their own pictures or use stock images. The results were compelling.

A selection of the finished comic books are embedded below.

Mr. Covey, Director of Library & Information Services

Posted in Tech in the Classroom | Comments Off on Modern Storytelling – Super Hero Comic Books

How to Update Chrome

We have been seeing a few issues lately with older versions of the Chrome browser and we recommend that you keep Chrome updated on your MacBooks to the latest version. Here are the steps to follow to update Chrome:

1. Load Chrome and click Chrome: About Google Chome in the menu bar in the top left hand corner of your screen:

Screen Shot 2016-03-30 at 08.23.02

2. Chrome will then automatically update and this progress bar will be visible:

Screen_Shot_2016-03-30_at_08_23_26

3. Wait a minute or so until this process completes and then click the Relaunch button:

Screen_Shot_2016-03-30_at_08_30_27

And that’s it.

Posted in Office Updates | Comments Off on How to Update Chrome

Grade 6/7 Latin – Roman Villa & Bath House Design

Grade 6/7 Latin students have recently been learning about Roman building structures and were tasked with designing either a traditional roman villa or bath house.

They started off by designing the floor plan of the building and used Google Drawing to layout the 2D structure of the different rooms.

They then used the SketchUp app on their MacBooks to create a 3D model of their building, based on their floor plans and previous building research. They created the model step-by-step:

Screen Shot 2016-02-11 at 10.17.101. The general structure of the building including the base
2. A cut out section of wall and/or ceiling so that the original structure is maintained but you can see inside one or two rooms
3. Detailing such as windows, door arches, and flooring
4. Colors and textures
5. Inserting appropriate pre-built objects, e.g. trees, wooden furniture, etc.
6. Text labels

Finally, they used QuickTime’s screen recording tool to record a virtual tour of their model, showing off different angles and close ups of their building. They then imported this video into iMovie and added a voice over to match, explaining the different sections and rooms.

A YouTube playlist of the finished virtual tours is embedded below:

Posted in Tech in the Classroom | Comments Off on Grade 6/7 Latin – Roman Villa & Bath House Design

Socrative, Kahoot, Poll Everywhere, TodaysMeet

In this week’s faculty technology training we looked four different online tools for creating quizzes, polls and online conversations.

Socrative

Socrative is a simple online student response system that allows teachers to quickly create and share quizzes and polls with students.

Here’s a good overview of what the app can do in the classroom:

Kahoot

Kahoot is another great online student response app and as we saw from Bob’s demo a few months ago the results can definitely be entertaining and competitive.

Again, here is a good overview of the app that walks you through how to create a quiz:

https://www.youtube.com/watch?v=pFFv6_6was4

Poll Everywhere

Poll Everywhere is another student response system with a few additional polling options to Socrative, for example the word cloud option.

Here’s a recent tutorial for the app:

Today’s Meet

And finally Todays Meet is a live chat tool that lets you create a temporary chat room that your students can use to discuss questions, topics or homework.

Here is a good post that shows a number of ways this can be used in the classroom and here is a quick tutorial on how to use the app:

Posted in Professional Development | Comments Off on Socrative, Kahoot, Poll Everywhere, TodaysMeet

Creating Google Forms

Google Forms are a great (and fast) way to create tests, quizzes and surveys for your classes. And they can also be a good project for students – surveys for data collection or creating quizzes and tests for classmates.

To create a form open your Google Drive, click the red New button, click more and then click the purple Google Forms option. A new tab will open up with your form – step one is to rename your form to something meaningful (and add a description if needed). You can now start to create your questions, the first one of which will be made for you.

You can enter the question on the left hand side of the question box, change the question type on the right hand side and make it a required question by using the slider in the bottom right:

Screen_Shot_2016-02-22_at_13_44_52

You can also duplicate the question using the square button next to the trash can. This option is very useful if you are going to be doing a lot of similar style questions on your form.

The types of question you are can ask are:

Screen Shot 2016-02-22 at 13.49.51

To add a new question or add media like an image or video to your questionnaire there is this floating box on the right hand side :

Screen Shot 2016-02-22 at 13.48.29

Click on the plus icon to create a new question and then edit the question as above.

In the top right of the browser there are additional options for your form, including a color palette if you want to change the template color (or add a header image):

Screen Shot 2016-02-22 at 13.52.00

The eye icon lets you preview your live form so you can test what it looks like and see the order of the questions. And if you click on the cog icon you will see further options for your form:

Screen Shot 2016-02-22 at 13.52.15

The first section is especially important here if you want to send the form to people outside of Hebron Academy as you will need to set this to Anyone. And scroll down to see additional presentation options such as shuffle the question order.

Finally click the Send button in the top right hand corner to send your form. You can send it via email here or get a link for posting on myHebron.

With your form still open, to see any responses you have received once your form has be sent out click the Responses tab:

Screen_Shot_2016-02-22_at_13_56_08

If you would like to collect your responses in a Google Sheet (like the old version of Google Forms used to do) click the green Sheets icon on this page. There is also the option to turn off accepting responses here if you don’t want anyone else to fill in the form. This is useful if your quiz or text has a deadline, or you only want the form available during class time.

Posted in Professional Development | Comments Off on Creating Google Forms

Using the Chrome Web Store

With the Middle School students receiving Chromebooks, here is a quick overview of using Chrome and the Chrome Web Store on your MacBooks to match most of the functionality of their Chromebooks.

A Chromebook is basically a simplified laptop that just runs the Chrome web browser, with everything linked to a Google Apps account. This means you can do everything the students will be able to do on your MacBooks, you just need to make sure you are using the Chrome browser (which you can download here).

Both the student Chromebooks and the Chrome browser on the MacBook can use all kinds of apps from the Chrome Web store, as well as existing web tools and web sites like Google Drive, Google Docs, NoodleTools, and Blogger – for these sites you just go to the web address as usual.

All the different apps available can be found in the Chrome Web Store, which will look like this when loaded in Chrome:

Screen Shot 2016-02-10 at 09.01.03

There is also a dedicated education section which you can access directly here. Apps are free from this store but some might require an additional purchase within the app to access additional functionality (e.g. the Quizlet teacher account).

You can search for an app using the search box in the top left hand corner and once you have found an app you would like to install, click on app’s picture and then click Add to Chrome:

Screen_Shot_2016-02-10_at_09_13_16

A pop-up box will appear asking for confirmation. Just click Add app:

Screen_Shot_2016-02-10_at_09_17_48

The app has now been installed to your Chrome browser (and your Google Apps account). You can see all the apps you have installed by clicking this button Screen Shot 2016-02-12 at 09.57.44on your home page or typing chrome://apps into the Chrome address bar (this mirrors what the apps tab on the student Chromebooks will look like):

Screen Shot 2016-02-10 at 09.21.24

Just click on an icon to load the app. You can also make new projects for the apps you have installed from the New button in Google Drive:

Screen_Shot_2016-02-10_at_09_21_12

And FYI, some apps might create new folder in your Google Drive to store files, etc. Do not delete this folder!

Posted in Professional Development | Comments Off on Using the Chrome Web Store

French 4 – Bastide 3D Design

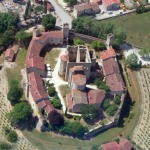
French 4 students have been learning about traditional French towns called bastides, which were typically designed with a surrounding wall and a central church and marketplace.

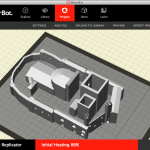
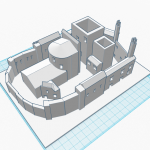
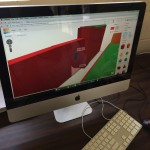
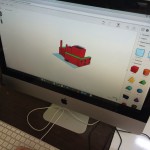
With the aim of getting the students to really study the design and layout of these types of towns they had to recreate a complete town in 3D using Tinkercad. They used geometric shapes and holes to draw the individual wall sections and buildings, complete with cutout window and door detailing.

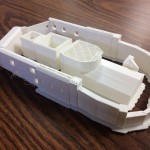
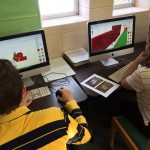
Each student was given a section of the town to recreate and the finished models were then stitched together and printed on the 3D printer. A selection of photographs from the project can be seen below, including a shot of the finished printed model:

Posted in Tech in the Classroom | Comments Off on French 4 – Bastide 3D Design

AudioCopy & GarageBand on iPad

For simple audio recordings on the iPad we recommend the AudioCopy app, which is a fast and efficient way to record and edit student audio work (such as interviews, role-plays or even just language practice). Once you open the app tap on Make New Recording and then tap the record button to start recording. And tap it again to stop.

All your recordings will be saved under the My Recordings tab, and there are a number of things you can do with each track:

Screen Shot 2015-12-01 at 10.39.27

Use Open With to upload directly to Google Drive, or the GarageBand option copies the track which you can then paste into GarageBand. If you have a SoundCloud account you can also upload directly to their audio hosting service.

You can also edit your track directly in AudioCopy. Tap on the green Edit button and you can then move the sliders around to trim the audio. Once the sliders are in place just tap on the blue pencil to get these editing options also:

IMG_0234

For more advanced audio editing on the iPad, such as creating podcasts and radio shows with sound effects and audio levels, we recommend GarageBand. The app has a massive amount of options and functionality but this video gives a good overview of what can be achieved when using spoken word audio:

https://www.youtube.com/watch?v=V25u81hqT1M

The app does work well on the iPad, but for more detailed edits and for fine tuning volume levels we recommend you first record the audio using the iPad and then move to the iMac lab in the library and use the desktop version of GarageBand. Here is a video which gives a good overview of this version:

Posted in Professional Development | Comments Off on AudioCopy & GarageBand on iPad

Grade 6/7 Latin – A Day in the Life of a Roman

The grade 6/7 Latin class have recently been learning about the life of ordinary Romans. For this project each student chose a different profession, from lawyer to soldier, and created a comic book detailing a day in that person’s life.

They researched and planned out their story first and then drew the individual cells by hand. Next they used the camera on their MacBooks to import their drawings, imported these into the excellent Comic Life app, and finally added titles, actions and speech bubbles.

The finished books were stitched together and published online. They can all be read below:

Posted in Tech in the Classroom | Comments Off on Grade 6/7 Latin – A Day in the Life of a Roman