French 4 – Bastide 3D Design

French 4 students have been learning about traditional French towns called bastides, which were typically designed with a surrounding wall and a central church and marketplace.

With the aim of getting the students to really study the design and layout of these types of towns they had to recreate a complete town in 3D using Tinkercad. They used geometric shapes and holes to draw the individual wall sections and buildings, complete with cutout window and door detailing.

Each student was given a section of the town to recreate and the finished models were then stitched together and printed on the 3D printer. A selection of photographs from the project can be seen below, including a shot of the finished printed model:

Posted in Tech in the Classroom | Comments Off on French 4 – Bastide 3D Design

AudioCopy & GarageBand on iPad

For simple audio recordings on the iPad we recommend the AudioCopy app, which is a fast and efficient way to record and edit student audio work (such as interviews, role-plays or even just language practice). Once you open the app tap on Make New Recording and then tap the record button to start recording. And tap it again to stop.

All your recordings will be saved under the My Recordings tab, and there are a number of things you can do with each track:

Screen Shot 2015-12-01 at 10.39.27

Use Open With to upload directly to Google Drive, or the GarageBand option copies the track which you can then paste into GarageBand. If you have a SoundCloud account you can also upload directly to their audio hosting service.

You can also edit your track directly in AudioCopy. Tap on the green Edit button and you can then move the sliders around to trim the audio. Once the sliders are in place just tap on the blue pencil to get these editing options also:

IMG_0234

For more advanced audio editing on the iPad, such as creating podcasts and radio shows with sound effects and audio levels, we recommend GarageBand. The app has a massive amount of options and functionality but this video gives a good overview of what can be achieved when using spoken word audio:

https://www.youtube.com/watch?v=V25u81hqT1M

The app does work well on the iPad, but for more detailed edits and for fine tuning volume levels we recommend you first record the audio using the iPad and then move to the iMac lab in the library and use the desktop version of GarageBand. Here is a video which gives a good overview of this version:

Posted in Professional Development | Comments Off on AudioCopy & GarageBand on iPad

Grade 6/7 Latin – A Day in the Life of a Roman

The grade 6/7 Latin class have recently been learning about the life of ordinary Romans. For this project each student chose a different profession, from lawyer to soldier, and created a comic book detailing a day in that person’s life.

They researched and planned out their story first and then drew the individual cells by hand. Next they used the camera on their MacBooks to import their drawings, imported these into the excellent Comic Life app, and finally added titles, actions and speech bubbles.

The finished books were stitched together and published online. They can all be read below:

Posted in Tech in the Classroom | Comments Off on Grade 6/7 Latin – A Day in the Life of a Roman

AP Literature – Hamlet Character Design

Over the past week the AP Literature class has been working on a technology project to design and create Hamlet faces in 3D. Each student selected a character from the play, sketched out their ideas for their face design and then sculpted them on the library iMacs using the Sculptris app.

Screen Shot 2016-01-14 at 10.44.47
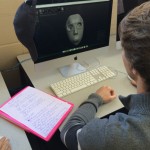
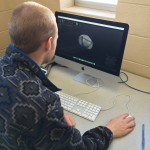
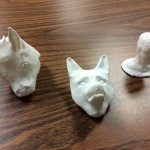
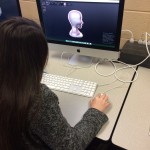
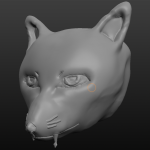
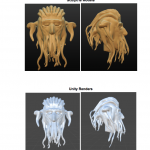
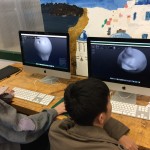
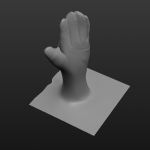
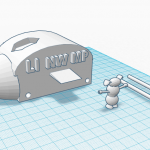
Some students based their creations on a simple mask template that was give to them (and created by students in the Computer Science class), and others created their models from scratch. They started by molding the overall shape of the face, added the larger facial features and then zoomed in to create the fine details.

The finished designs were them printed on our 3D printer and will be displayed along side a piece of reflective writing based around the original character they chose.

A selection of photographs and screenshots can be seen below, including some shots of the finished printed models:

Posted in Tech in the Classroom | Comments Off on AP Literature – Hamlet Character Design

Share Video on the iPad

Here are the steps to record, upload and share a video using the iPad and Google Drive:

  1. Record and edit your video using the Camera app on the iPad
  2. Close the Camera app and load the Google Drive app
  3. Tap the blue plus (+) icon the bottom right:

IMG_0239

4.  Tap the Upload button:

IMG_0246

5.  Tap the Photos & Videos button:

IMG_0247__1_

6.  Select the video you want to upload and then tap the check mark:

IMG_0244

7. Once the video has finished uploading tap the three dots next to the file:

IMG_0248

8. Tap the Add people option:

IMG_0248

9.   Type in the person’s email address and finally tap the send icon:

IMG_0245

They will then receive an email with a link to the file which they can view or download.

Posted in Professional Development | Comments Off on Share Video on the iPad

Computer Science – 3D Modeling Concepts

During Computer Science class for the past two weeks we have been looking at different concepts, styles, techniques and apps for creating video game 3D models.

We started off by using Tinkercad to create geometric shape-based space crafts and then discussed different ways of creating more organic looking asteroids from the same tools. We then moved into digital sculpture using the Sculpris app, which lets you morph and carve digital clay into the exact shapes you want.

The students used the symmetry tool to create monster heads, complete with facial features and additional detailing to create a finished model that could be viewed at any angle.

We then went back into Tinkercad and talked about human body proportions and created a human template, again using basic geometric shapes. We then transitioned back to Sculpris to try and mold a similar body shape and finally added additional detailing to turn this into a finished  video game monster character.

A selection of screenshots of student work in Tinkercad, Sculptris and Unity (to get an idea of what the final render in a 3D game would look like) can be seen below, as well as a photo of two monster heads printed on our 3D printer:

Posted in Tech in the Classroom | Comments Off on Computer Science – 3D Modeling Concepts

Tinkercad 3D Modeling

Tinkercad is a browser-based 3D modeling app, which lets you build 3D models from geometric shapes, letter and numbers. It is very easy to use, but can also create quite detailed models that can be downloaded and printed on our 3D printer.

Once you have loaded the site you will need to create an account using the blue Sign up button in the top right hand corner. And the first time you log in the app will guide you through some basic lessons on how to create objects and move shapes around. If you want to skip these lessons just click on the Tinkercad logo in the top left.

Now you can click Create new design to start creating your own model. Here is what the app will look like and what the different buttons on the screen do:

Screen_Shot_2016-01-19_at_09_11_55

To start with you just need to drag a shape from the right hand side onto the blue grid (called the workplane). Once a shape has been placed you can select it and use the white boxes to resize the shape, or use the arrows to rotate it:

Screen Shot 2016-01-19 at 09.15.43

Next, you can start to add additional shapes next to this shape, or reposition the workplane to start adding shapes on top of it:

Screen_Shot_2016-01-19_at_09_24_15

You can also click on the drop down menus in the top left of the screen to see additional options like copy, paste, etc. And in the Design drop down the Properties option lets you rename your model.

One you are finished with your model you can click the Design dropdown, select the Download for 3D Printing option and choose .STL to download a file that can then be uploaded to, and printed on, our 3D printer.

For a more detailed look at Tinkercad here is a good video tutorial of the app, that gives an overview of the different tools and takes you through how how to create a basic model step-by-step:

https://www.youtube.com/watch?v=KCaenAGeK_Q

There is also this excellent Getting Started with Tinkercad PDF guide from Bonnie Roses at 3DVinci.net, which again gives a nice overview of the app.

Posted in Professional Development | Comments Off on Tinkercad 3D Modeling

Phishing Emails

Over the past month or so we have seen an increase in phishing emails directed through the school email system. These are emails that look like they come from someone inside the school, or an official business or service, and anything you click on inside the email takes you to a professional looking (but fake) website that then asks you to login again and then collects your user name and password.

The best piece of advice we can give is to be very careful with any emails you receive, especially if they have links and images inside them or there is some kind of request for money or gift cards. Think about the kinds of email you normally receive and who you receive email from. And never click a link or image and then reenter your username and password into a website you are not 100% sure about.

In addition, here are a few things you can look out for in the emails you receive to check if they are real:

  1. Spoofed Email Addresses

Always double-check the actual email address you are replying to. In Gmail you can double-click on the name in the To: field to see the full email address. Also we have turned on a few security features within Gmail so if the email address is someone outside of Hebron Academy you will get this message on your screen:

2. Mismatched links

A link in a phishing message will often appear to be perfectly valid but if you hover your mouse over the top of the link, you should see the actual linked address. If the hyperlinked address is different from the address that is displayed in the email, the message is probably fraudulent or malicious.

3. Embedded images

A lot of phishing emails contain embedded images that you can click on. As above, if you hover over the image the website it is linked to will display. Does the link make sense to you? Is it linking to a correct .com address that you regularly use?

4. Content from services you have not used before

Emails from companies such a DocuSign complete with legal disclaimers and logos can look very official. But think about whether you have ever used or heard of this service before, and how people usually share information with you. Most documents shared between faculty and students is either done through Google Drive or just regular attachments.

5. Poor spelling, grammar or formatting

If the text of the email (both subject and body text) has noticeable spelling and grammatical errors, or formatting issues, then the email is likely to be malicious. Especially look out for all caps or different font styles and colors.

6. No message context

If you receive an email that is vague in what the message is about be very wary of the content. Most emails you receive should at least mention you by name or explain in some detail what the content is about and what the attachment/link/image is for.

Here is a good example of such a message that is fraudulent but looks to be a Google Docs file link:

Screen Shot 2016-01-06 at 09.51.26

Notice the poor formatting of the document title with extra spaces and the incorrect use of Analyse instead of Analysis. And in the actual email the link was to a http://tinyurl.com address instead of http://docs.google.com/. The email subject was also in all caps.

If you do receive an email and you aren’t sure about whether it is real or not please contact the Tech Office.

Posted in Office Updates | Comments Off on Phishing Emails

Sculpture & Printmaking – 3D Body Parts

After a trip to the Body Works exhibition in Portland to research, sketch and find inspiration, sculpture students used the Sculptris 3D modeling software installed in the Art iMac Lab to create 3D body parts.

The software gives you a blank sphere of digital clay to work with and using tools like grab, pinch, smooth and draw, students molded the material using the mouse into the shape of the body part and then added additional detailing such as muscle fibre and veins.

Once complete the models were then exported out of Sculptris and printed using our 3D printer. To finish the project the students will paint and display their models. A selection of pictures of the students working in the lab, their 3D creations and finished prints can be seen below:

Posted in Tech in the Classroom | Comments Off on Sculpture & Printmaking – 3D Body Parts

Grade 6/7 Spanish – 3D Festival Logos

For the final part of the Spanish project based around festivals, grade 6/7 students planned out and designed a logo for their festival. We looked at examples, discussed what makes up an eye-catching logo  and students then used the scribble tool in a Google Drawing to sketch out their ideas.

We then switched to Tinkercad and students had to construct their ideas in 3D using shapes, holes and letters, with the idea to vote on the best one and print it using our MakerBot 3D printer. They also take screenshots of their work and will create a blog post to reflect on the class.

A couple of examples of what the students produced can be seen below:

Posted in Tech in the Classroom | Comments Off on Grade 6/7 Spanish – 3D Festival Logos