American Literature – WordPress Class Portfolios

Inspired by a previous post, for their culminating project American Literature students had to create a class portfolio of their writings from the year. Using a WordPress blog students had to submit ten pieces of class work complete with an inline image, write an about me post for their roster entry (a separate tab on the site to allow anyone to see just a specific individual’s writing) as well as write a number of reflective comments on their classmates’ writings. Each class also had to decide on a header image for their site.

Links to the finished portfolio sites that contain all the students’ posts for each class are listed below as well as a couple of screenshots of the two designs:

Posted in Tech in the Classroom | Comments Off on American Literature – WordPress Class Portfolios

Biology – Garden Design Presentations

During the last couple of weeks of school Biology students’ final project was to design and plant a digital garden. Students designed their garden as a means to learn about plant structure and function. They produced a detailed 2D design of their garden using either the sketching tools in Notability or the shape tools in Pages. They then created a presentation to pull all of their research together using Prezi and its zooming features, including additional detail on at least 3 plants that mature per growing season. Students also created a 3D sculpture of a plant which they could then screenshot and label within the presentation. For the 3D work we used the Sculptris app on the library iMacs.

A couple of their finished presentations are embedded below, as well as some photos of the students working on different areas of the project:

Posted in Tech in the Classroom | Comments Off on Biology – Garden Design Presentations

Honors Geometry – Scale Models

Honors Geometry students spent the latter part of the winter term working through a unit on similarity. As an extension of this unit, they worked through a project on 2-dimensional scaled floor plans and 3-dimensional models during one of the two experimental schedule weeks. As pairs, students were assigned to find the actual measures of one of the floors of the Science Building or the Library. Each student was then charged with drawing a to-scale floor plan of the area, complete with accurate measures. To conclude the unit, we moved to the computer lab and built 3-D models to be printed with the 3-D printer.

Ms. Gerrits-Leyden, Math Teacher

Posted in Tech in the Classroom | Comments Off on Honors Geometry – Scale Models

Grade 6/7 Art – Google Slides Animation Videos

Grade 6/7 Art students recently completed a 2D animation project using a combination of their Chromebooks and the iMacs in the library computer lab.

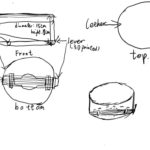
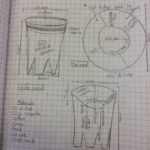
The students started off by storyboarding their ideas to plan out the narrative of their animations. They then created a simple bouncing ball animation in Google Slides on their Chromebooks, practicing the workflow of adding objects to a slide – then duplicating this slide, moving the objects, duplicating it again, moving the objects and so on.  When presented and the slides are changed in quick succession the animation plays out frame by frame.

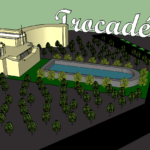
Next, using this technique the students created their own short animations using their own objects and background images. Most students ended up with around 300 frames in their presentation file, but the largest was over a 1000.

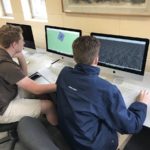
We then moved to the library iMacs, exported their Google Slides deck into iMovie, used the speed tool adjust the frame rate, added background music and then exported and shared the finished movie file.

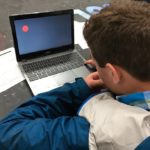
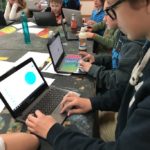
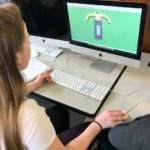
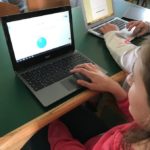
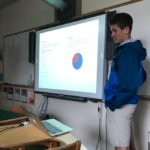
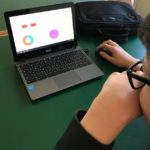
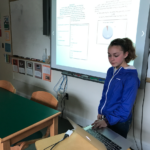
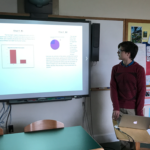
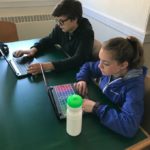
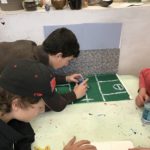
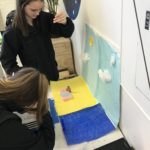
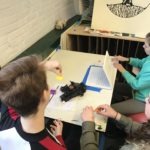
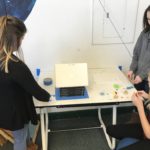
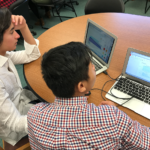
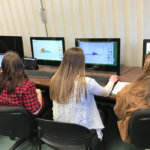
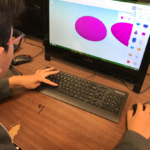
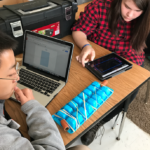
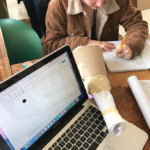
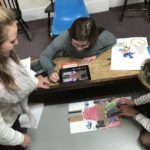
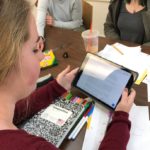
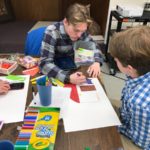
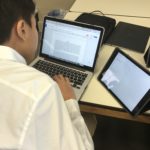
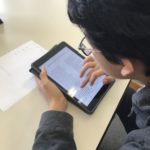
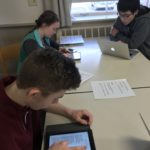
Their animations are all collected below in a YouTube playlist as well as a few shots of the students working on their Chromebooks:

Posted in Tech in the Classroom | Comments Off on Grade 6/7 Art – Google Slides Animation Videos

Functions and Applications – Trigonometry Stop Motion

The students in the Functions and Applications class recently embarked on an exploration of the graphs of sine and cosine. They used the ratios that they had been studying during the unit on right triangle trigonometry to physically measure and then graph the appropriate values. Taking a hands-on approach to this topic helped students reach a better understanding of why the graphs of sine and cosine look the way they do, because they were in fact, creating them from scratch! The exploratory process was documented on the iPads and later synthesized as a stop motion video. Creating the video enabled students to step back, look at the project as a whole, define the important points, and find a creative way to share it with others through the video.

Ms. Bonis, Math Teacher

Posted in Tech in the Classroom | Comments Off on Functions and Applications – Trigonometry Stop Motion

French 1 – 3D Paris Monuments

The French I students have been learning basic vocabulary to describe the world around them. During the Spring Trimester, the focus of this vocabulary acquisition is the “City” and what better lieu to use for our study than the shining queen of all cities, Paris!

Each student researched a well-known sightseeing site in Paris. Then, armed with a catalog of 3-D images of well-known buildings and aided by Mr. Crofton, the students produced a “map” of these places using shapes, textures and pre-built models in the 3D modeling tool SketchUp. The students added streets, sidewalks, buildings, plazas, fountains, trees, and even the winding Seine to their map. This was a great way to practice their vocabulary: les rues, les trottoirs, les batiments, les places, les fontaines, les arbres, et la Seine.

Hopefully, the ultimate goal of this project will be met in the near future when these students walk by the fountains of Trocadero, climb la Tour Eiffel, stroll through Musée D’Orsay, and wonder at the marvels of wonderful Paris, now knowing more about these places than they did before!

Ms. Reedy, French Teacher

Posted in Tech in the Classroom | Comments Off on French 1 – 3D Paris Monuments

Modern Storytelling – Podcasting

This year’s Modern Storytelling class listened to episodes of a variety of podcasts, getting a feel for how stories are effectively told through this audio format. After listening to a collection of programs, we had a Skype visit from T.M. Camp, creator of the mythology podcast Find Your Gods. The students then used the skills they learned to create a single episode of their own podcast. No instructions or restrictions were given regarding the content or theme of their episodes. The results were remarkable!

Mr. Covey & Mr. Paul, Modern Storytelling Co-Teachers

Posted in Tech in the Classroom | Comments Off on Modern Storytelling – Podcasting

Grade 7 Math – Surveys & Data Analysis

Grade 7 Math students spent the past two weeks working on a survey project, with each student picking a topic of interest, creating a survey based around this topic, collecting data from the school community and then analyzing and reporting their results.

They worked through the following steps, using a range of different apps in the process:

  1. Define research question (Google Docs)
  2. Create survey (Google Forms)
  3. Distribute survey (Gmail)
  4. Data collection (Google Sheets)
  5. Data manipulation (Google Sheets)
  6. Data analysis (Google Sheets)
  7. Report findings (Google Docs)

Creating Google Forms and working with data in a spreadsheet were brand new skills for most of the students, which we took even further by creating custom templates when designing the surveys and manipulating the data collected using calculations and formula. The students also created several different types of charts and presented their findings to their classmates.

Here are some screenshots of their surveys and photos of the students working hard on their Chromebooks and presenting their final reports:

And a selection of their finished reports are embedded below (click the square icon in the middle to view the documents full screen):

Posted in Tech in the Classroom | Comments Off on Grade 7 Math – Surveys & Data Analysis

Grade 8 – Claymation

A technology integration project that was recently completed in 8th grade Art was claymation stop motion videos. This is when you turn a succession of individual still images into a movie by stitching them together and playing them at high speed. For this project the students’ ideas (brainstormed and sketched out in a storyboard) had to be based around using clay models that could be moved a tiny bit at a time, as well as their own drawing skills and any other appropriate props such as cardboard, paper, etc.

To start with we discussed the workflow for creating these ideas into a finished movie, including setting up their workspace, using a MacBook cameras and Photo Booth to take the images and how much movement should be added with each new image (the focus here was getting the students to realize how many still images they would need to take even for just a 30-second film).

Once they had completed the filming we then looked at how to get the images into iMovie, how to remove the automatic Ken Burns effect that iMovie adds and changing the clip length for each image to less than a second. They then added some basic editing effects including titles, transitions and a background music track. The final piece was then to present their finished movies to the entire Middle School during morning meeting.

The completed films can all be seen below as well as a few shots of the class filming in the art studio:

Posted in Tech in the Classroom | Comments Off on Grade 8 – Claymation

Video Project Production Steps

If you are thinking about completing a video project with one of your classes, this is the standard process of film production that we recommend following:

  1. Treatment. This is a short paragraph describing the purpose of the video project and could also include discussion on what do I hope to achieve, why I am making it and who is the intended audience. This could be something you give to the students or they write themselves.
  2. Write a complete script. This could just be a straight Google Doc but if you wanted it to look more professional here is a script template to use.
  3. Create a storyboard. This is to help brainstorm, plan out, organize and frame each shot with quick visual sketches. There is also a line underneath each box for voice-over text. Here is a simple template that can be used for this step. You could print this out and have the students sketch with pencil (or they could import it into Notability and use the app’s drawing tools). Note that if the project is going to include still images they should be added to the storyboard.
  4. Filming. Film each individual shot from the storyboard using the Camera app (or something like Stop Motion Studio or Hyperlapse if you want to film using a different technique). Any still images that are going to be used should also be collected and saved at this point.
  5. Editing. Here you have a choice of editing everything on the iPad, using the iOS version of iMovie to stitch the individual shots together, and cut away any unwanted sections of each clip. Or the clips could be uploaded to Google Drive and then downloaded to the library iMacs to be edited in the more fully-featured desktop version of iMovie.
  6. Post-production. Use iMovie to add titles, transitions, voice-over and/or background music (and their volume levels).
  7. Sharing. Each student should share their completed project with you via Google Drive (or uploaded to YouTube) as the file will be too big to email.

You could also think about flipping the order of steps 1 & 2 as this can make it easier for students to organize their ideas before they have to write the script. 

And here are some examples of Hebron Academy student projects that were created using these steps and some of the apps mentioned above:

Posted in Professional Development | Comments Off on Video Project Production Steps