AirServer iPad Mirroring

AirServer is an app that lets you wirelessly mirror an iOS device’s screen to your MacBook (and therefore project it). Once installed and activated here are the steps to get mirroring in Air Server working:

1. Load the AirServer app on your MacBook. It runs in the menu bar in the top right hand corner of your screen.

2. Click the AirServer app icon (a square with an arrow pointing upwards) and select Preferences:

Screen_Shot_2014-11-19_at_2_03_41_PM

3. Under the General tab choose to set a Fixed Password (or Onscreen Code if you want students to be able to mirror their iPad, for which a code will pop-up each time a device tries to connect) and then enter a password you would like to use to connect:

Screen_Shot_2014-11-19_at_2_04_02_PM

We recommend using your iPad passcode as the password to keeps things simple. If you don’t set a password anybody on the network can mirror their display to your MacBook.

4. Next, on the iOS device swipe your finger up from the bottom of the screen (or double tap the home button) to get access to Control Center. One of the options on this screen will be Screen Mirroring – tap on it:

5. The small pop-up window that appears is scrollable. Scroll until you find your name and then tap it to start mirroring (depending on which password option you have selected from step 3 you may need to enter your fixed password or the onscreen code that pops up on your MacBook):

6. Your iOS device screen should now be mirrored to your MacBook. To toggle between full screen mode on your MacBook click on the green button in the top left of the AirServer window (this toolbar may autohide so you just need to hover your mouse over the area in the top left):

Screen_Shot_2016-09-21_at_08_17_58

To stop the mirroring just click the red x button:

Screen_Shot_2016-09-21_at_08_17_58

You can also stop the mirroring on your iOS device by swiping up to access Control Center, tapping the AirPlay section and then tapping Turn Off AirPlay Mirroring.

If you have any issues with AirServer, first try toggling the mirroring off and on in the AirPlay menu on your iOS device. If that does not work, try quitting the app on the MacBook and starting the process over.

Finally, one tip when using the iOS device and AirServer in the classroom is to increase the time to auto-lock. That way you won’t be entering your pin code on the iPad so often. To do this locate and open the Settings app, tap the General option on the left hand side and then tap the Auto-Lock option on the right hand side:

photo_1_copy_2

We recommend choosing 15 minutes.

If you are having issue using AirServer in your classroom an alternative is to plug in your iOS device to your laptop using the lightning cable and mirror the display through QuickTime. Complete instructions for this can be found here (You must be running the latest version of OS X on your laptop for this to work).

Posted in Professional Development | Comments Off on AirServer iPad Mirroring

School Email Account iOS Setup

Many iOS apps use email to export data (for example this is the easiest way to share photos you have taken with your iPad) so we recommend setting up your Hebron Academy email account on your iOS devices for this purpose:

1. Locate and open the Settings app

2. Tap the Mail, Contacts, Calendars option on the left hand side and then tap Google:

photo_1_copy

3. Fill in your name, Hebron Academy email address, password and enter ‘Hebron Academy’ for the description. Click Next and then click Save.

share_button4.  You will now be able to check your school email on your iPad using the Mail app, and use the blue share button inside most apps to export or share your data via email.

Posted in Professional Development | Comments Off on School Email Account iOS Setup

Grade 8 History – Aztec Poem Videos

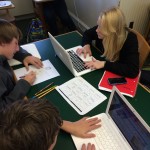
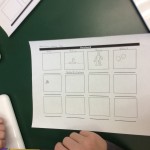
Grade 8 History students recently completed a technology project based around a poem they had written on the Aztecs. In groups, their task was to create a multimedia presentation of their poem using photographs, drawings and images from the internet. They first storyboarded their ideas, then compiled the images they needed, constructed their timeline in iMovie and finally added voice over and background audio. Each group then presented their creation to the class and discussed their process and how they worked together.

Below is a gallery of the groups hard at work and a movie playlist of their finished projects:

Posted in Tech in the Classroom | Comments Off on Grade 8 History – Aztec Poem Videos

Find a Meeting Time with Doodle

doodleR_smallDoodle a free online tool that makes it easy to find a meeting time when every attendee is available. You do not need to create an account, you only need to provide an email address.

1. Go to Doodle’s site: http://doodle.com

2. Click the blue Schedule an event button

3. Fill in all the event details and provide your email address. Click Next.

4. Select the potential dates of the meeting by clicking on them in the calendar (you can select one or more dates). Click Next.

5. Enter the different time options for each day (click Add further time slots if you need more slots). Click Next.

6. Create a Basic Poll. Click Next.

7. Select the Everyone with a link can participate option. Click Finish.

9. You can now copy and paste the Doodle link they give you and email this to everyone you want to be at the meeting. Also, open the link yourself and enter the dates and times you can make – you just need to enter your name, tick the options you can make and click Save.

10. To see who has entered their selections you can open the same link. You will also receive email notifications when someone enters their choices. And once everyone is done you can then select a meeting time and let everyone know.

Posted in Office Updates | Comments Off on Find a Meeting Time with Doodle

Document Creation Apps

There are a number of choices on your MacBooks and iPads (and the library for student projects) for document creation, and they all include a selection of tools to create more advanced document layouts (not just text).

microsoftword256x1. Word. This is installed on all faculty MacBooks and there is now a free app for all iOS devices (although you will need to sign up for a free Microsoft account to access documents you save in the cloud).

To create more complex layouts than just a standard text document Word allows you to use templates, which you can select from the first screen that loads up when you open Word, or from the drop-down File menu:

Screen_Shot_2014-11-17_at_9_58_16_AM


This will put Word into Publishing Layout View, which allows you to position text boxes, images, shapes, WordArt, etc. much more easily than the normal Print Layout View. When you are working in this view there is also this additional toolbar at the top of the main window to give you easy access to the different drawing tools:

Screen Shot 2014-11-17 at 9.58.37 AM


2. pages-icon-100066664-largePages. This is Apple’s version of Word, is installed on all faculty MacBooks and can be downloaded for free onto your iPad. For doing more complex page layouts Pages is much easier and quicker to use than Word. Text boxes, images, shapes, etc. can be dragged around the page whenever you want and you do not need to switch between views, as in Word. Most of the tools you need for this are already at the top of the window, and rest can be seen on the right hand side when you select an object:

Screen Shot 2014-11-17 at 10.13.18 AM


3. Google Docs is a great way to create and share simple documents, but there are also some basic layout options. Under the Insert drop-down you can add images and drawings (shapes):

Screen_Shot_2014-11-17_at_10_44_16_AM


Once you have inserted an image you also get some basic layout options. Selecting Wrap text will let you position the text around the image:

Screen Shot 2014-11-17 at 10.48.00 AM


lucidpress-logo-icon-circle4. The apps mentioned above all create great traditional documents layouts, which can then be printed or converted into something like a PDF for sharing. If you want to take this a step further by creating documents built for the web with more interactive elements a great option is Lucidpress. This is a browser-based app that gives you similar tools to Pages and Word for inserting text boxes, shapes, etc. but also allows you to embed YouTube videos, Google Drive files as well as add actions like pop-overs and external links. The document can then be published and viewed online.

Here is a quick overview of the service:

5. One final tool that can be useful for publishing  standard documents created Word or Pages to the web is something like Issuu. Once you have a PDF of your document you can upload this to their site and it will be published as an interactive magazine with page turns and zoom functionality. Here is an example from the Maine College of Art:

Posted in Professional Development | Comments Off on Document Creation Apps

Math Department iPad Pilot Program

apps_books_moreAs part of the MLTI Primary program all faculty were issued with a MacBook Air and iPad mini this year, along with the aim to start a 1:1 iPad program with all students next year. We have spent the last month or so testing and setting up the different accounts to administer the iPads and to centralize app purchases.

As the next step, we recently started a pilot program in the Math Department, purchasing a selection of apps and providing additional training to the teachers, with the aim to get the teachers using their iPads more during class.

Here are some of the apps we looked at during the training sessions:

1. Air Server – allows you to mirror your iPad display to your MacBook (and therefore also your projector)
2. Notability – a note taking app that also lets you import/export PDFs and annotate over the top of them
3. PCalc – a powerful calculator app
4. GraphCalc HD – graphing calculator
5. EQ Editor – create and edit math equations
6. MyScript MathPad – freehand equation creator
7. MyScript Calculator – freehand calculator
8. PhotoMath – solve equations with your camera

We will check in with the teachers in a couple of weeks, and send out a survey to see how everything went, as well as providing ongoing support. Using these experiences to guide us we will then provide school-wide training and apps throughout the rest of the year to get everyone ready for the move to 1:1.

Posted in Professional Development | Comments Off on Math Department iPad Pilot Program

Freshmen Skills – Google Search

This week in the Freshmen skills class we did a couple of sessions on Google search skills. This included an introduction into how Google actually works when you hit the search button – PageRank, spiders, etc.. A good overview of this is detailed in the following video:

Next we looked at the layout of a Google search results page and how to choose specific keywords from a question or statement to get the best results.

We then worked through a series of search challenges on this Google form, which involved multiple searches and some deduction:

Screen Shot 2014-10-24 at 12.19.53 PM

After running through some examples as a group, where students explained their process to find specific answers, we looked at a selection of other tools that Google provides. This included Google News, Google Newspaper search, Google Books, etc.

Here is the slide deck from the lesson:

More resources like these can be found on the Google Search Education site.

Posted in Tech in the Classroom | Comments Off on Freshmen Skills – Google Search

Google Docs Hints & Tips

Within Google Drive you can create a number of different online document types. Just click the red New button:

Screen_Shot_2015-09-24_at_13_01_23

Any document type you create can be edited and accessed from any browser and can be collaborated on by multiple people at the same time. This is especially useful for group projects and collaboration.

You can think of the blue Document as Microsoft Word, Presentation as PowerPoint and Spreadsheet as Excel, although they do not have all the functionality of the corresponding Office apps. Drawing is a simple art app similar in many ways to Paint on Windows and very useful for technical diagrams, design plans or even mind maps.

Once you have created one of these document types, to share it with other people simply click on the blue Share button in the top right hand corner. There are three levels of permission: editing, commenting or viewing. Once you share a document with someone they will get an email notifying them with a link and it will appear in the Shared with me section of their Google Drive.

One useful feature within all document types is the ability to download your document as a different file type to your computer. Click File: Download As to see these options:

Screen_Shot_2014-10-24_at_10_02_04_AM

This allows you to convert your Google Doc to a PDF or Word Document (or presentation to PowerPoint, etc.) if you wanted to upload it to myHebron or email it as an attachment without sharing it.

Another useful feature across all the document types is the ability to add comments at specific points in the document. Click the word or section where you would like to add the comment, click the Comments button in the top right and look for this icon in the toolbar Screen Shot 2014-10-24 at 10.05.43 AM. Click the blue comment button when you are done to add the comment and it will appear on the right hand side of the window:

Screen Shot 2014-10-24 at 10.12.03 AM

Anyone you share the document with will be able to see the comments and (if they have permission) add their own. This is very useful for corrections to a paper or department document or for grading.

In the Tools drop down menu there are additional features for all document types, including a word count and check spelling options. But the most useful is the Research Tool:

Screen_Shot_2014-10-24_at_10_14_15_AM

Click this to reveal a side panel on the right that lets you search these different sections of Google within the document (click on the icon next to search to reveal the different options):

Screen_Shot_2014-10-24_at_10_17_18_AM

And allows you to quickly add quick citations to any work you have used, including where you found specific images. Hover your mouse over any result from your search and you can either preview the site in another window, insert a link on to your document or add a footnoted citation automatically:

Screen Shot 2014-10-24 at 10.29.31 AM

If you want to use and cite an image simply drag it onto your document and again the footnote will create automatically for you:

Screen Shot 2014-10-24 at 10.20.45 AM

Although not a replacement for something like RefMe it can be useful for smaller projects and papers, especially if you want to record image locations or quickly build up lists of links used.

Posted in Professional Development | Comments Off on Google Docs Hints & Tips

Google Drive Hints & Tips

1. There are two sections to Google Drive – My Drive which is the files and folders you have created, and Shared with me which is everything that has been shared with you by others:

Screen_Shot_2015-09-24_at_13_05_41

If you delete a file from My Drive it will go into the trash. If you delete a file from Shared with me it deletes only your link to that file and not the original file which was made by someone else. As with your email inbox we recommend using folders (click New: Folder and drag files into them) to organize your My Drive, and remove any documents from Shared with me you no longer need.

If you want to add documents from Shared with me to your My Drive you can either right click on  the document and select Add to My Drive (this still only creates a link to it) or right-click and choose Make a copy to make a completely separate version.

2. Any file or folder within Google Drive can be shared. Just look for this button to share something: Screen Shot 2014-10-16 at 2.07.47 PM. You can easily share with any with the Hebron community or use your roster from myHebron to share with a class. Their are three levels of sharing to choose from depending on the situation: edit, comment or view.

You can also click on Get shareable link if you want to post a link to the document on myHebron or in an email:

 Screen_Shot_2015-09-24_at_13_14_12

The link will appear under the enter names box and be something like https://docs.google.com/a/hebronacademy.org/document/d/1j0bswvZPc7g1Df5uLA7PMNfwR4mWOrz4xjfhKY/edit?usp=sharing

3. Again as with Gmail, we recommend using stars to keep track of important files or files you need to refer back to regular. Just right-click on a document and select Add star and the file will show up in the starred list accessed on the left-hand side:

Screen_Shot_2015-09-24_at_13_05_41

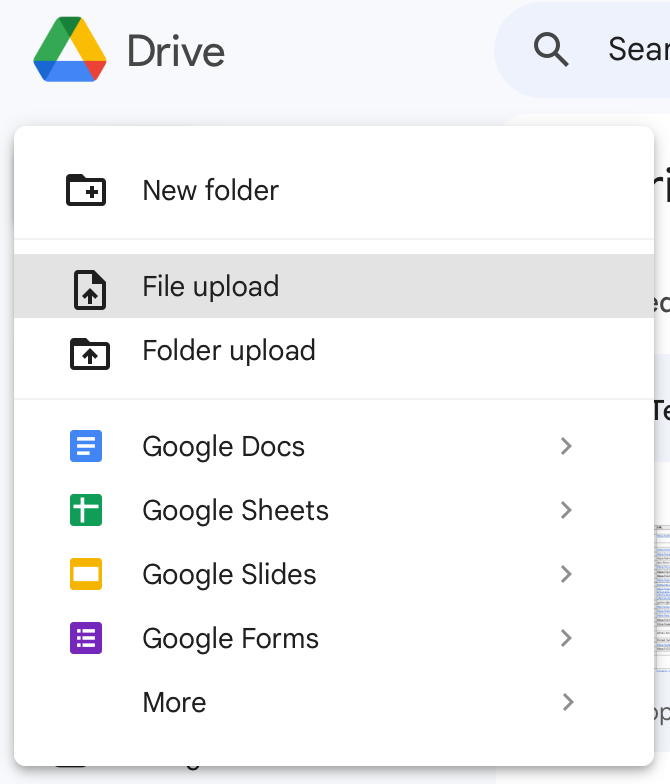
4. To upload any file to your My Drive just hit the red New button and then click File upload.

4. Finally, as mentioned in the Storage in the Cloud post, another option is to use the Google Drive app on your MacBook Air. This is a similar tool to something like Dropbox that lets you sync files between your computer and the cloud. You can download the app from here and just follow the steps to install it. The end result being that you will now have a folder called Google Drive which will contain links to all the Google Docs you have created:

google_drive_finder_window_620px

You can now put any kind of file into that folder and it will sync up to Google’s servers and you will be able to access it anywhere.

Posted in Professional Development | Comments Off on Google Drive Hints & Tips

Uploading to Google Drive

Google Drive is included with your school email account and can be easily accessed on the web through the grid in the top right hand corner of your email:

Screen_Shot_2014-10-15_at_9_57_46_AM

Inside Google Drive you can use the New: File upload option to upload any file to your drive:

Additionally, starting last year with your new MacBook Airs another option we strongly recommend using is the Google Drive app, which was pre-installed for you.

This allows you access to all your Google Drive and Shared Drive files from the desktop and Finder links. Any file you drag into these folders is instantly uploaded. More information can be found here.

Posted in Professional Development | Comments Off on Uploading to Google Drive