During the technology training sessions this week we took a look at three different creative apps on the iPad.
Paper by 53
Paper by 53 is a sketching, note-taking and art app that takes a slightly different approach to creating digital drawings and artwork. Your sketches, notes and artwork are saved within separate moleskin-style notebooks and the app has a range of different drawing tools to use, including watercolor paintbrushes.
This video gives a good overview of the latest version of the app and shows off some of the drawing tools included:
Comic Life
Next we looked at Comic Life, an app for creating comic books using either photographs taken on the iPad or images saved from the internet. The app has all the tools for designing and laying out a comic book, with panels, speech bubbles, action text as well as a different page templates. You can also use a range of image filters to apply comic book style effects to your images.
Here is a good overview of the app that shows you the steps to create a comic book:
Do Ink Animation
Finally we looked at Do Ink Animation, an advanced frame-based animation app for the iPad. Using the app’s editing tools you can draw a scene and objects and then copy and move these objects over multiple frames to create a flick-book style animation. This is similar in style to creating animations in Flash and is a great narrative tool for the classroom.
Here is an overview of the app and quick tutorial on creating a simple animation from the developers:
Note that only faculty currently have access to this app. If you would like to use it in your classroom please let us know so we can purchase additional copies for your students.
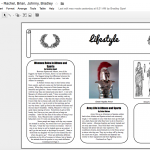
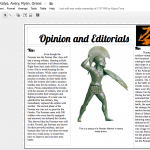
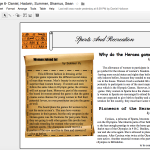
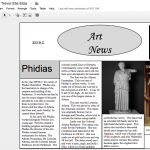
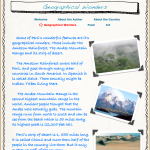
A large group project the Freshmen completed this semester in their English and Humanities classes was an Ancient Greek newspaper. The students were split into groups and each was responsible for one section of the newspaper, from World News to Sports and Opinions. There were also different roles within each group, with one person chosen as the section editor, one as the designer and the rest as writers.
As the content was created, proofread and edited, the designer created a page template using Google Drawing based around the following design rules and then began to layout the content:
Use color only in pictures (can use greyscale shapes)
Limit font use in your section (can use bold/italic)
Maximum of four columns per page
Need to include your section heading on first page
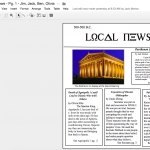
World News section needs to include the masthead (name, date, price) and index information
Each article needs a headline, lede and byline
All photos must have a caption
Can use appropriate newspaper-style graphics, e.g. barcode, weather icon
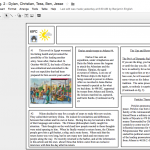
Screenshots of the group’s pages being created in Google Drawing can be seen below:
The finished product was then stitched together as a complete PDF and then turned into an interactive online newspaper using ISSUU:
Posted inTech in the Classroom|Comments Off on Freshman English & Humanities – Greek Newspaper
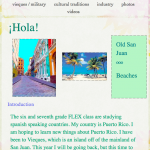
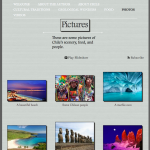
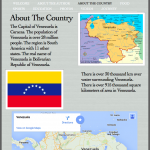
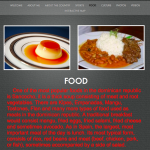
In grade 6/7 Spanish Flex classes this semester we have been creating Spanish Country websites using iWeb. After the students had been allocated a Spanish speaking country to explore, students planned out their sitemap using Google Drawing, researched and collected their content in a Google Doc, chose an initial template design in iWeb and then created the basic site content over six pages:
Home page
About the author
About the country
Three different topics
They were then able to start to add interactive content to their pages, including an introduction video, a scrolling gallery page, embedded YouTube videos, embedded Google Maps sections, an Google Earth tour using QuickTime screen recordings and a complete journey using the My Maps feature of Google Maps.
Screenshots of some of the student’s website pages can be seen below :
Posted inTech in the Classroom|Comments Off on Grade 6/7 Spanish – Spanish Country Websites
Timeline 3D is a great app for creating and presenting timelines on the iPad. From a list of events organized by date the app creates a 3D presentation which can then be navigated through.
To start a new timeline click on the plus (+) icon, tap Create Timeline and then give your project a name:
You can now create new events, view or edit any existing events or tap play to present your timeline:
At the top of the screen you can also tap Configure to change the theme and a few other options.
Tap the plus icon (+) on the above screen to add a new event and then simply fill in all the details (dates, notes, links) required. You can also add a picture or movie from your Camera Roll where it says Add Media:
Once you have added all the events for your project tap the play button to present your timeline. The app will first prepare your presentation:
Then present it in a 2D overview:
You can now tap any event and it will switch to a 3D view which you can scroll through taping left or right:
There are also additional controls that will appear if you tap at the top of the screen, including Done to exit the presentation:
Timeline 3D also has multiple options to share your project. Tap the share icon to see these options:
Sharing as a PDF is probably the most useful of these options, but you can also publish to the web or export as a slideshow that can be viewed in PowerPoint.
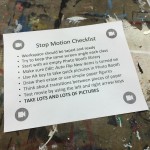
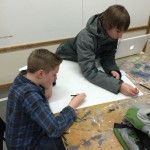
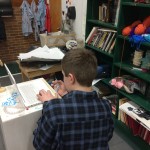
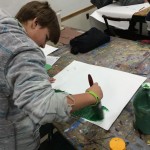
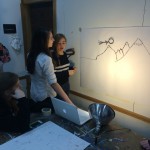
A technology integration project that was recently completed in 8th grade Art was stop motion videos. This is when you turn a succession of individual still images into a movie by stitching them together and playing them at high speed.
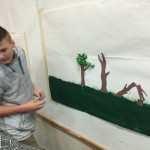
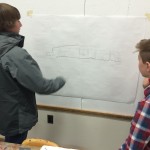
The students started off by looking at a variety of commercial stop motion projects, such as Kina Grannis’ music video, and then sketching out their own ideas on a storyboard. For this project their ideas had to be based around using simple paper materials that could be posted up on a wall, their own drawing skills and any other appropriate props.
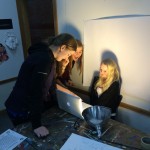
We then discussed the workflow for creating these ideas into a finished movie, including setting up and taping their workspace (so they would know the exact position of everything each time they started class), using their MacBook cameras and Photo Booth to take the images and how much movement should be added with each new image (the focus here was getting the students to realize how many still images they would need to take even for just a 30-second film).
Once they had completed the filming we then looked at how to get the images into iMovie, how to remove the automatic Ken Burns effect that iMovie adds and changing the clip length for each image. They then added some basic editing options including titles, transitions and a background music track.
The final piece was then to present their finished movies to the entire Middle School during morning meeting, in the style of a film festival with an introduction from the makers and audience Q&A after the showing.
The completed films can all be seen below as well as a few shots of the class filming in the art studio:
Book Creator is a great app for creating and sharing interactive (including video content) ebooks right on the iPad which can then be read as a proper ebook using the iBooks app or exported as a PDF.
To get started open the app and tap New Book (there is also a great tutorial book pre-loaded which gives a good overview of the app’s features):
Next you have to select the orientation of the book, from portrait, landscape or square (this depends on the type of book you are going to be creating – we would recommend landscape just because it gives you more space to work with):
The app creates the first few pages for you, including the cover page. Using the tools underneath the plus (+) icon you can now begin to add content to your pages:
There are a variety of objects you can add, including text, images, video and audio. And once you have added an object it can then moved and rotated around the page using the standard pinch to zoom and rotate gestures.
If you tap an object to select it you can find further options such as font, colour, etc. by tapping the i icon:
One additional feature is the ability to add text links to either other pages (for a contents pages) or URLs to webpages. When you are adding text you are able to select it and one of the popup options is to add a link:
And as mentioned you can add a link to another page using the page number or a web address:
To navigate the pages that have already been created by the app just tap the arrow (< or >) icon at the side of a page, or tap the Pages button to see an overview of your book:
In the Pages view you can also delete and reorder pages in your book:
When you have finished adding content to the first few pages to add more pages tap the plus (+) icon at the current end of your book:
Once you have finished your content, before sharing or exporting the book you need to change its title and author. Tap My Books in the top left hand corner and then tap the i underneath your book:
Now you are ready to share or export your book. You can either tap the share button underneath your book in the above screen (this gives an additional option of exporting it as a video):
Or you can tap the share icon when you have the book open:
Sharing to iBooks lets you read it as a normal ebook complete with page turn animations and other options such exporting it to Google Drive will convert it to a PDF for reading on any device.
There are a number of rooms and labs around campus that can be booked in advance for an event or for use during one of your classes. Viewing of prior bookings and the ability to create a new booking is all done through your Google Calendar.
Subscribe to Resource Calendar
To subscribe to the complete calendar for a room (this is useful if you are going to booking the room frequently as it will stayed loaded in your calendar view) load your Google Calendar and then:
– Click the plus icon next to Other calendars – Click Browse resources:
– Find the room you would like to add from this list and then click the checkbox (you can also click the eye icon here to preview the room’s calendar):
– Click the back arrow in the top left of the browser to return to the normal calendar view
Booking a Resource
To add a new booking for a room click red + Create button in the top left hand corner of the browser, click More options, fill in all the event details such as time, description, etc. and then click where it says Rooms:
From the list that appears, add the room you want to book and then click the blue Save button at the top of your screen. It will appear at the bottom of the list once it is selected. If the room does not appear in this list it means that that time slot is currently unavailable and has already been booked by someone else. If you subscribe to the calendar you will be able to view who has booked it.
Posted inOffice Updates|Comments Off on Booking Rooms & Labs in Google Calendar
Any time the keyboard is open to input text there is a dictation icon next to the spacebar:
Simply tap this to start dictation.
iPad Text to Speech
There are a couple of options you will need to turn on to get test to speech to work on your iPad. Open the Settings app, tap General,Accessibility and then Speech. Turn on the first two options:
Now when you are in an app you can select any text (by tapping and holding, and dragging the cursors around the text) and tap Speak:
You can now also swipe down with two fingers from the top of the screen and the iPad will start reading aloud text, beginning at the top of the page. Some controls will also appear that allow you to speedup, slowdown and move the speaking position around the page:
MacBook Dictation
This was written for older versions of macOS. For Mojave onwards there is a good guide here.
On a MacBook, to turn on dictation you need to go to System Preferences and click on the Dictation & Text to Speech icon:
From the dictation tab you can then turn dictation on (you can also enable enhanced dictation if you think you will be using this tool a lot with ESL students to improve the accuracy):
You can now use the keyboard shortcut to use dictation in any app, just press the function (fn) key twice.
MacBook Text to Speech
To turn on text to speech you need to be in the same section of System Preferences as above, then click the Text to Speech tab at the top:
Now select the option that says Speak selected text when the key is pressed. The default key to get this to work in an app is Option+Esc. Any text you have selected when you press that key combination will be spoken out-loud by the computer.
Explain Everything is a design, screencasting, and interactive whiteboard app that lets you annotate, animate, narrate, import, and export all kinds of different files and media. There are many types of projects you can do with Explain Everything but we are going to look at four main uses in this post.
1. Mobile Interactive Whiteboard
Just like Jot! and Notability, Explain Everything can be used a mobile interactive whiteboard when used in conjunction with Air Server. In a similar way to those apps Explain Everything offers a blank canvas on which you can use pen tools, shapes text boxes and insert pictures, documents and other objects.
First you just need to create a new project:
And then select the template design you would like – these will just give you different color backgrounds and different default color options.
You can now use the different tools on the left hand side to start annotating, drawing, etc. on the canvas which can then projected up on the board:
Double tap on a tool (or color pallet in the bottom left hand corner) to see more options. You can use the hand tool to select objects and move them around the canvas, including the pinch to zoom and rotate gestures.
2. Create Multipage Documents/Presentations
Because Explain Everything allows you to add multiple pages/slides in a project (combined with the powerful drawing tools) a lot of schools use the app to create a multitude of different document types. This could just be a simple presentation document which is then presented directly through the app, or more document-based projects like a science reports, newspaper, ebook or comic book which is then exported and shared as a PDF at the end of the project.
To add multiple pages to your project tap the plus button on the bottom bar, and tap the Slide x of x drop down to browse your slides:
Once you are finished with the project to export it as a PDF to your Google Drive account, first tap the share icon:
Then tap GDrive (you will need to login to your Google Apps account the first time you do this), make sure PDF file is selected, and tap Export.
Once uploaded you can then share your document using the Google Drive app on the iPad or in the browser on your MacBook.
3. Annotating Existing Documents and Presentations
In a similar way to Notability, you can also use Explain Everything to import existing resources like PDF documents or PowerPoint presentations from your Google Drive. You can then annotate over the top of these – either to project on the board or create new content with (or to share with) students.
Tap the plus button to use the Insert an object tool, and tap Photo, Video, or File:
Select GDrive and find the file you want to import, select it and tap Choose. Note that if your document has more than one page Explain Everything will create slides for each page.
One great feature with Explain Everything is that it allows you to select, move and zoom (using the normal tap, pinch to zoom and rotate gestures) the individual pages of a documents as a separate object. This allows you to position the page how you would like and then add any additional annotations on top. Here is an imported PDF file for example:
4. Creating Video Screencasts
The final feature of Explain Everything is that it allows you to record your actions when creating the above projects and then export those actions as a video. This is a very quick and easy way to create flipped classroom videos you can then share with your students, or for your students to create explanation and reflection videos as classroom projects.
To record as you create a project just tap the record button in the bottom bar (tap pause to stop the recording, and rewind to start again):
During recording Explain Everything will also record any sounds from the in-built microphone so you can easily record your voice to add narration to the project. Note that you can record actions on multiple slides which will be added together in the final video.
There are also laser pointer-style tools included that you can use to highlight sections of a slide and their motion will also be recorded (double tap the target icon to see the different pointers):
Here is an example video of what can be achieved very quickly with this app:
And here are a few more examples made by students here at Hebron for Math homework:
Once you have recorded your video, as before, tap the share icon to export it. Just make sure Video is selected, tap GDrive and then Export:
Once uploaded you can then share your video using the Google Drive app on the iPad or in the browser on your MacBook.
For more help and ideas with Explain Everything we recommend these 3 books, all free from the iBookstore:
One project we have been working on in the Technology department this year is to start getting more of our events live streamed. This is so parents unable to make the journey to school can still watch live. For the past two years we have streamed our winter music concert using Ustream, and through doing this have learned a lot about audio quality, camera placement and bandwidth requirements.
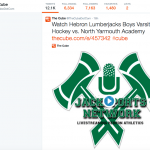
However, we knew we wanted more options that Ustream could offer, so we have moved over to The Cube (formally called High School Cube). This is a newer service that includes a lot more social features especially for sporting events, for which you can tag other teams, follow other school’s cubes, include a live scoreboard, etc.
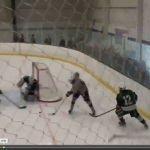
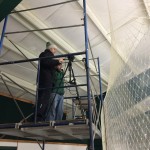
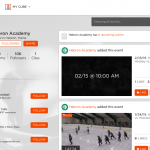
Recently we have been using this site to live stream our home hockey games, complete with play-by-play and color commentary, follow-the-puck camera work and pre-game coaching staff interviews. Below you can see the live stream setup above the rink and some of the ways we have been getting to word out to the Hebron community. We were even featured on The Cube’s Twitter feed.
Posted inOffice Updates|Comments Off on Live Streaming School Events